


Honey Sea Salt Focaccia made with Sourdough Discard
(By Allison White, owner of Matriarch Bread Co.)
What is sourdough discard?
After your starter has peaked and begins to fall, the contents of your starter are now considered discard. We use part of our no longer active starter to inoculate a new batch of flour and water to keep the mother alive, but what do we do with the rest? Many bakers opt to keep discard in the refrigerator to be used for bakes instead of throwing it away, because when kept in the refrigerator the discard can still be used as a leavening agent for several days. As time goes by, the acidity builds up too much, even in the fridge, so it’s best to use discard that is no older than two days for this particular recipe.
This recipe will steal your heart, and can be easily modified by choosing different toppings. Honey and sea salt is my personal favorite, but you can be as creative as you’d like! This is one of my most frequently ordered items at Matriarch and I hope you enjoy baking it as much as I do.
Honey Sea Salt Focaccia Recipe
Scroll to Printable Recipe
Yield: Two 9 inch round focaccia.
Timing: Active: 25 minutes; Inactive: 14 to 15 hours; Total: 14 to 16 hours

Dough
Ingredients
| Ingredient | Grams | Baker’s % |
|---|---|---|
| Water | 355 | 68 |
| Sourdough discard – no older than 2 days and kept in refrigerator | 110 | 21 |
| Olive Oil | 18 | 3.5 |
| All-Purpose Flour | 490 | 94 |
| Whole Wheat Flour | 30 | 6 |
| Fine Sea Salt | 9 | 2 |
Total Hydration: 92.5%
Equipment: Brød & Taylor Folding Proofer, Stand Mixer, Large Bowl, 2 Shower Caps or Flour Sack Towels, Two 8 or 9 inch Nonstick Round Cake Pans, Cooling Rack
Set up your Brod & Taylor Proofing box with the water tray in the bottom, set the box to 75°F (24°C).
Mix your dough: In the bowl of a stand mixer, put the dough ingredients in one at a time in the order listed. It is important to put the water first otherwise the flour will stick to the bottom and not mix properly. Also, the starter (discard) and the salt should not touch in order to ensure proper fermentation. Mix on stir or the lowest setting for 30 seconds and then increase to the second lowest setting (level 2 on a Kitchen Aid stand mixer) and mix for 5 minutes. After 5 minutes, with a wet hand, transfer the dough into your large bowl, cover with a shower cap or flour sack towel and place into your Brod & Taylor Proofing box set at 75°F (24°C).
Stretch and Fold: After 30 minutes, with wet hands, perform one series of 4 stretch and folds to your dough. Lift one corner of the dough at the north of the bowl and gently pull up and over from north to south, then repeat east to west, south to north, and west to east. Cover and place back in the proofing box. After another 30 minutes perform a second set of 4 stretch and folds, this time more gently than the first. Cover and place back in the proofing box for one hour.

Oil Pans: Close to the end of the hour-long proof, generously oil the bottom of two 8 or 9 inch round cake pans. Set aside.
Divide Dough: After one hour, gently turn out your dough on a lightly water-misted countertop and divide in half. Place each half into one of the well-oiled pans. Very gently press the dough outward. At this point it will not stretch very far; do not force the dough. Cover each pan with a shower cap or flour sack towel and place back into the proofing box for one more hour.
Tip: A accessory shelf can be used to increase the space in the proofer, or alternately the two tins can be stacked on an offset using a small dowel for support.
Overnight retard: After one hour, the dough will have relaxed some. Put the covered pans into the fridge for the night to slow down the proof.

Prepare for your bake: The next day, 3 hours before you’d like to bake your focaccia, remove the pans from the refrigerator and place back into the Brod & Taylor box set at 75°F (24°C).
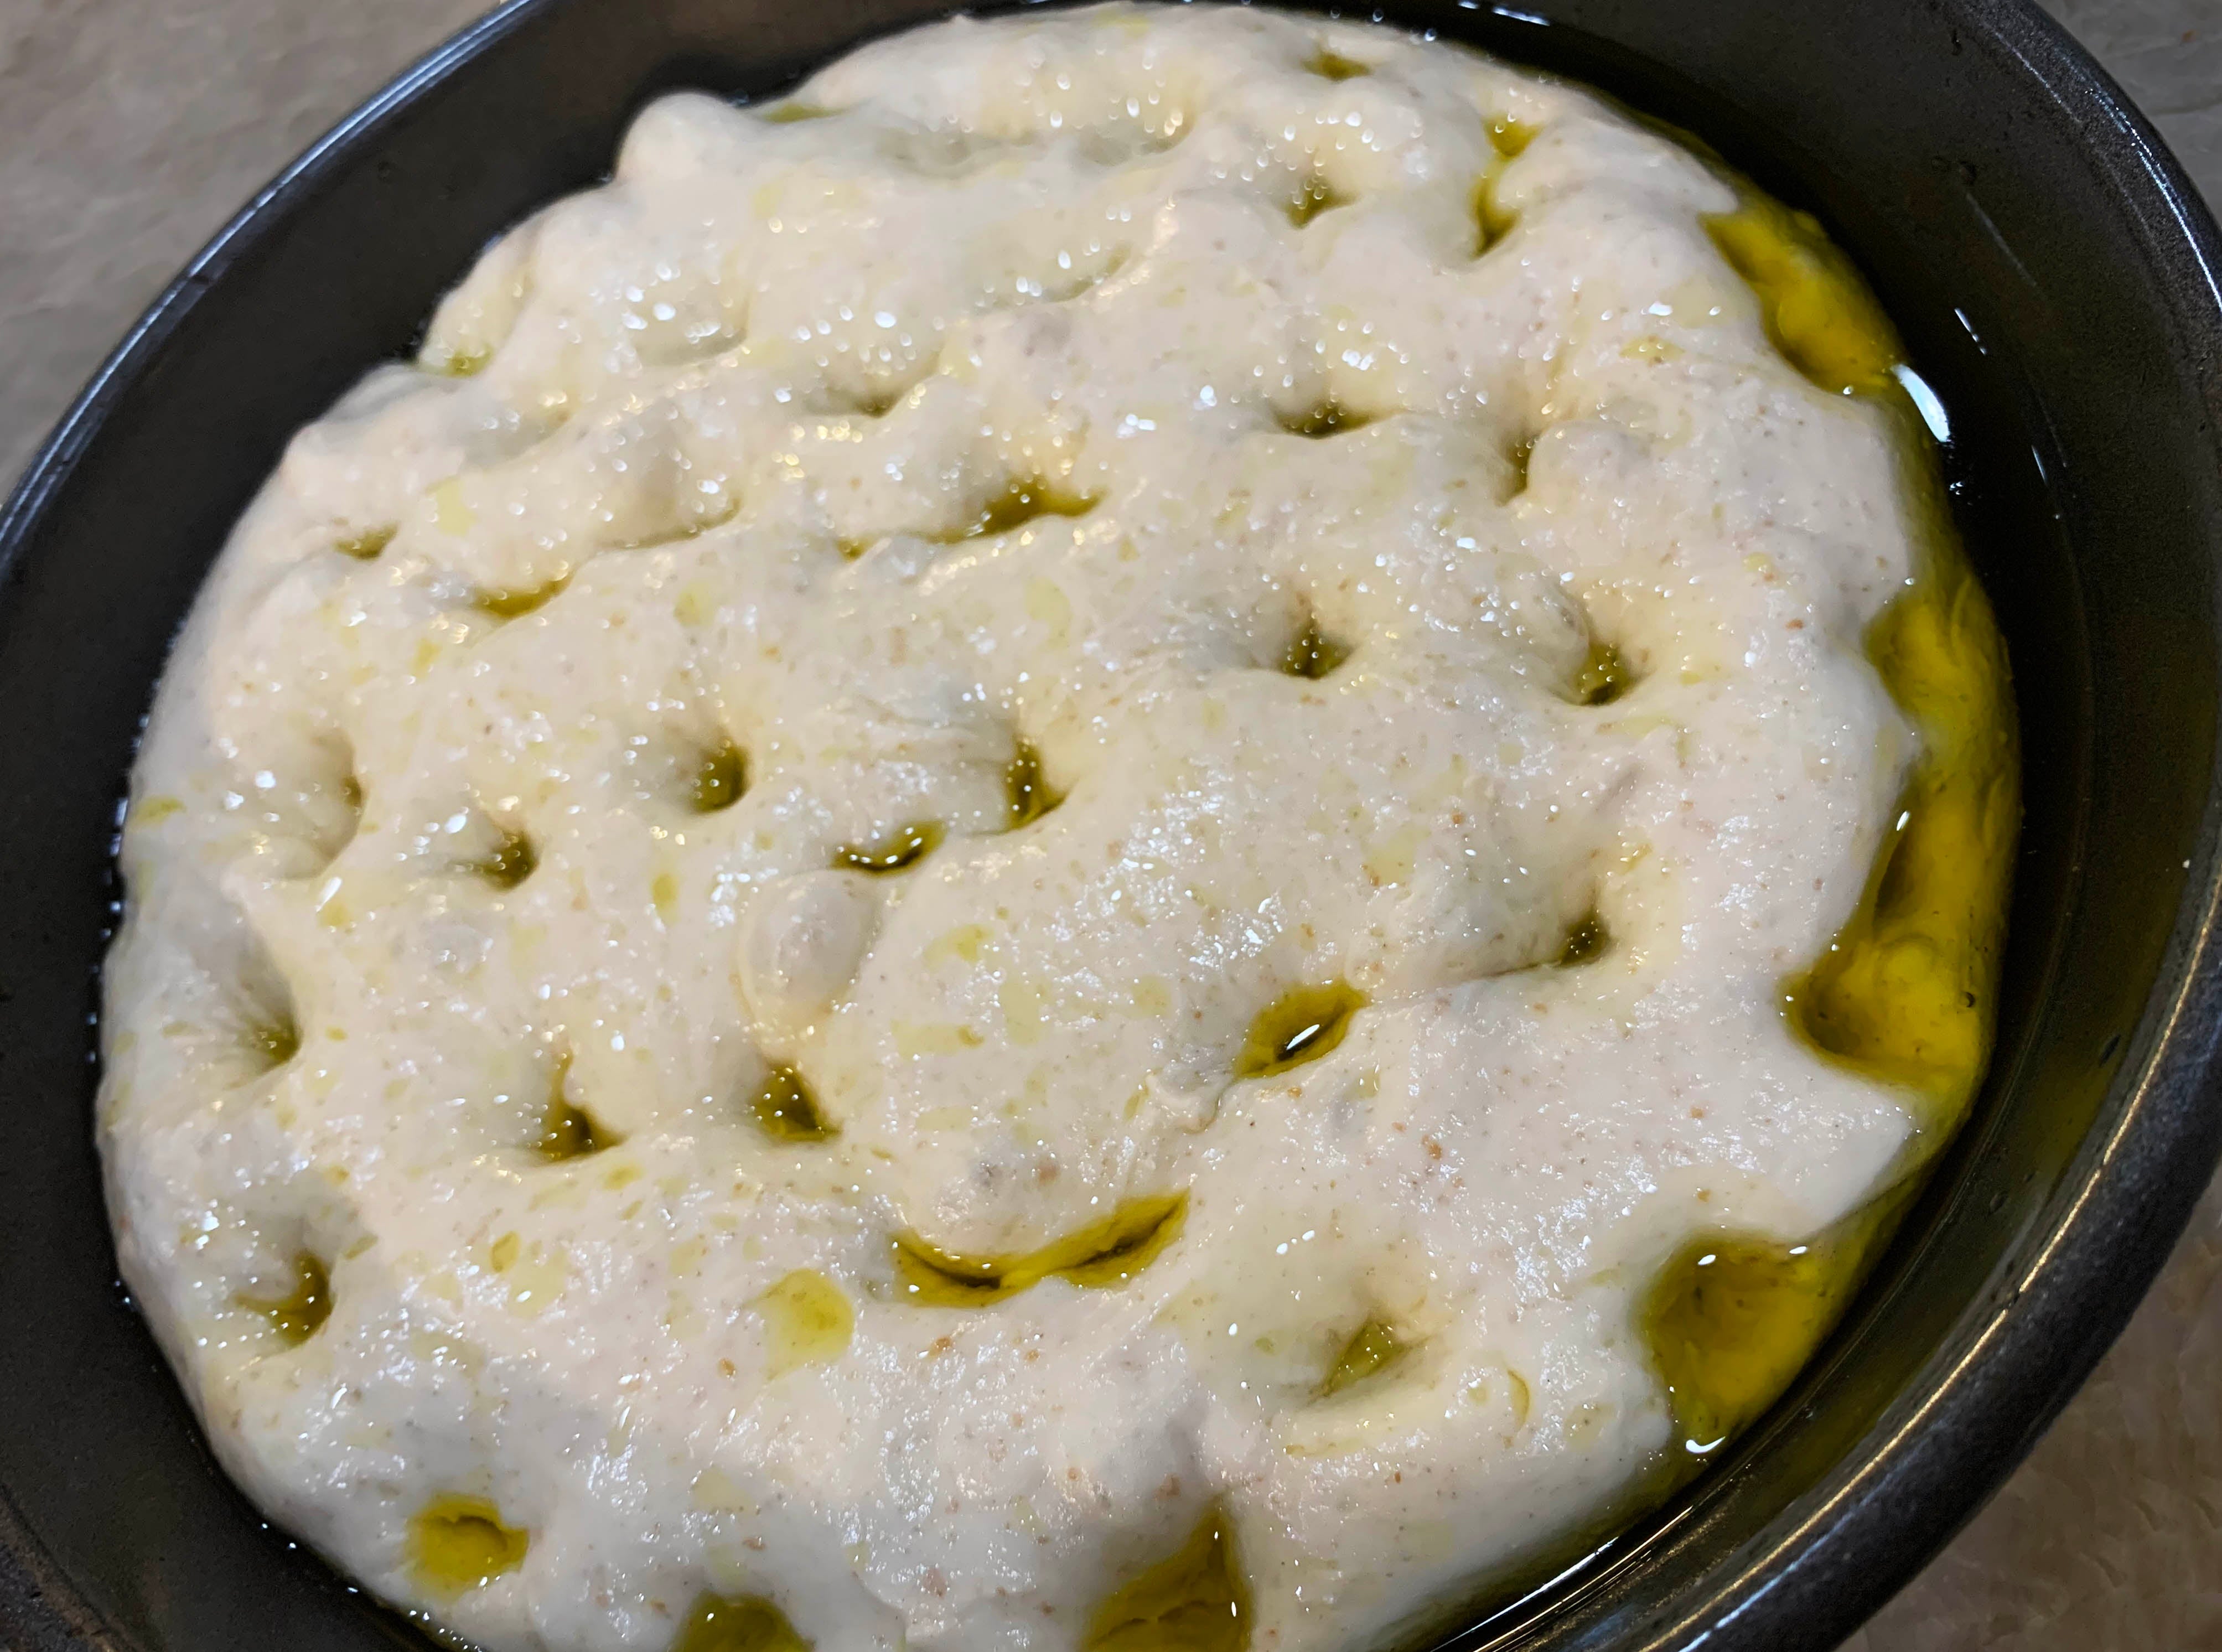
One hour before you bake, remove the pans from the proofing box, remove shower caps or towels, and pour a generous amount of olive oil on top of each dough. With wet or oiled fingers, press all the way down to the bottom of the pan with your fingertips straight down into the dough. Repeat until you have dimpled all over the dough in a somewhat even pattern. Cover and place back into the proofing box.
Preheat oven: 30 minutes after you have oiled and dimpled your dough, place the oven rack to the middle, and turn your oven on to 425°F (218°C) convection or 450°F (232°C) if your oven does not have convection.
Bake: Place the pans side by side in the oven on the middle rack and bake for 23-26 minutes, turning the pans 180 degrees halfway through the bake.
Topping
| Table header 0 | Grams | Ounces | Baker’s % |
|---|---|---|---|
| 2 T of Honey | 40 | 1.5 | - |
| Sprinkle of coarse sea salt | - | - | - |
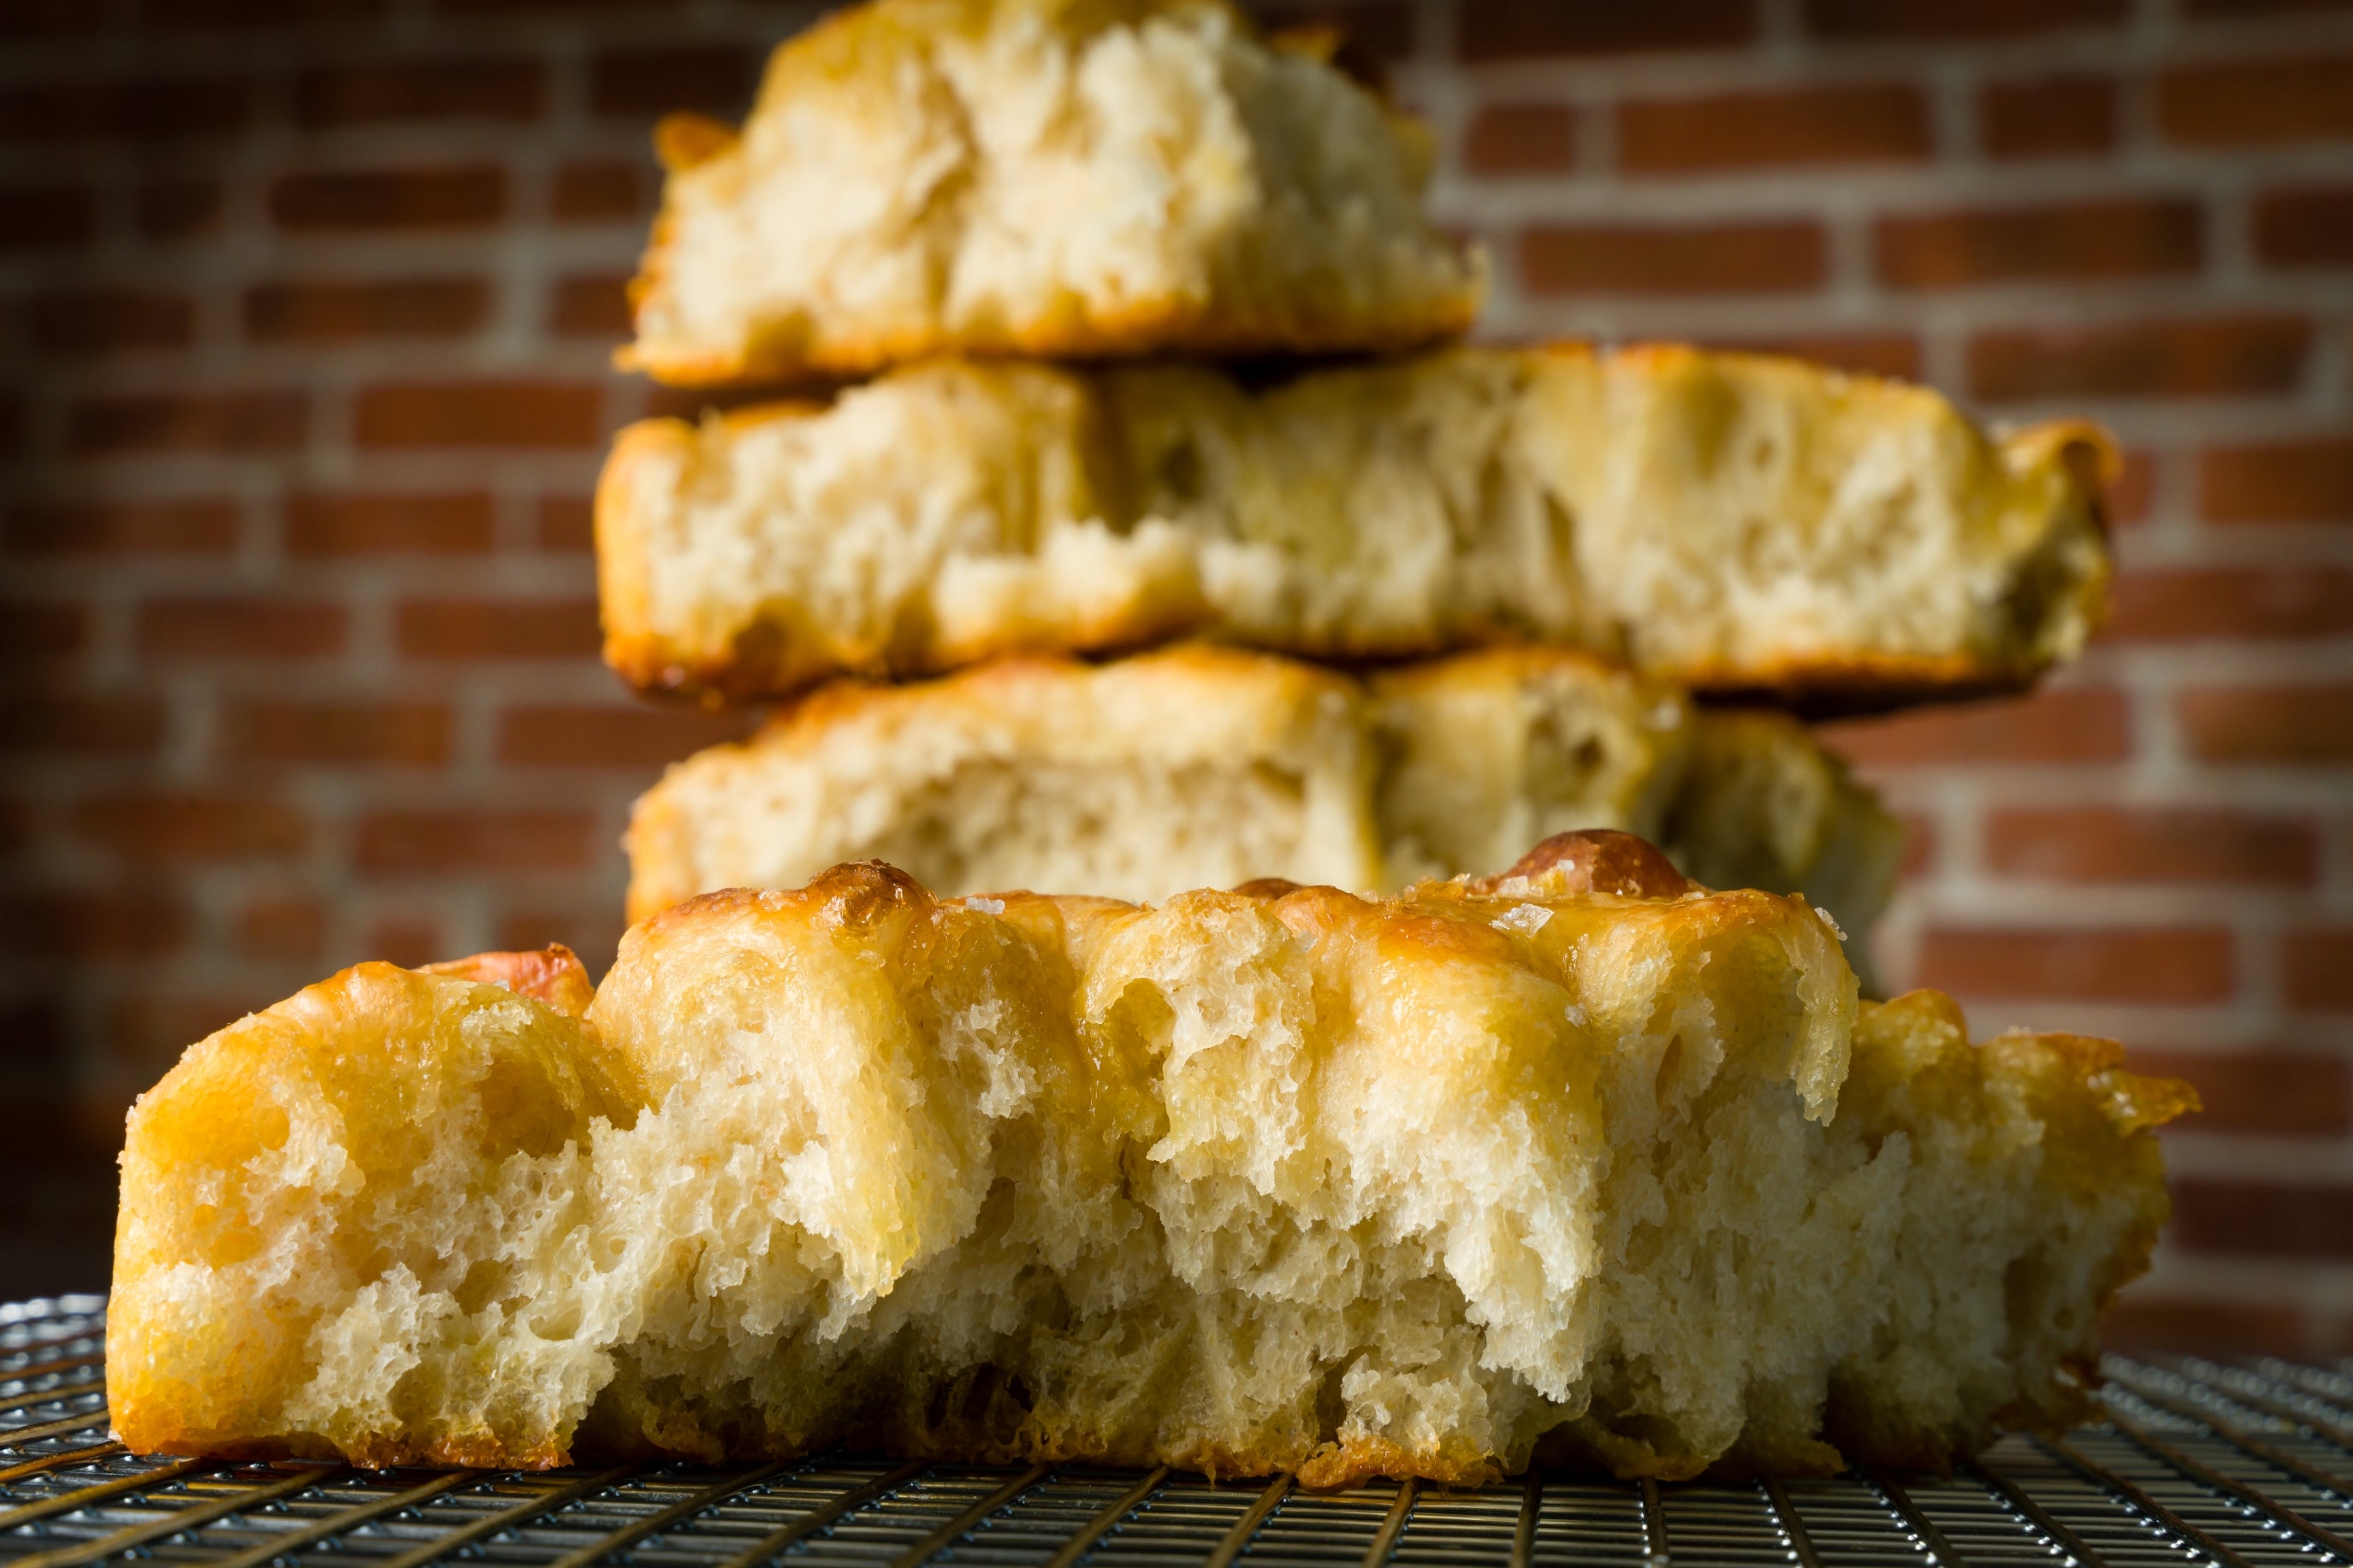
Honey glaze: After approximately 17 minutes of baking, remove the pans from the oven. Drizzle honey over the top of the bread, and then sprinkle with coarse sea salt. Return to the oven for the final 6 - 9 minutes to allow the bread to finish baking and the honey to caramelize. The loaf is ready when golden brown around the edges and a little lighter in the center.
Cooling and Storage: When the focaccia are done baking, immediately remove them from the pan as soon as they come out of the oven and set directly on a cooling rack. Let the bread cool for at least 20 minutes before slicing. Any uneaten bread can be stored inside a paper bag, and keeps well for about a day.
I love to decorate mine with edible flowers and herbs, a fun and festive addition to any focaccia!
Tips for Success
Don't rush: Your dough is ready to go in the oven when it’s puffy and bubbly; don’t rush the process so you can achieve the best possible results.
Use a fork for removal: Using a fork to easily remove focaccia from the pans to the cooling rack has been my favorite way to do this quickly and efficiently.
Adjust timing to suite your schedule: I usually prepare this dough around 6pm at night, and place into the fridge by 9pm. It can stay in there until about 3 hours before dinner the following day and become a great addition to dinner, although I usually bake mine first thing in the morning to send out on bread deliveries. Do what works for you! You can also opt for an ambient bake by allowing the dough to fully proof at room temperature for several more hours and forego the overnight proof in the fridge.


