


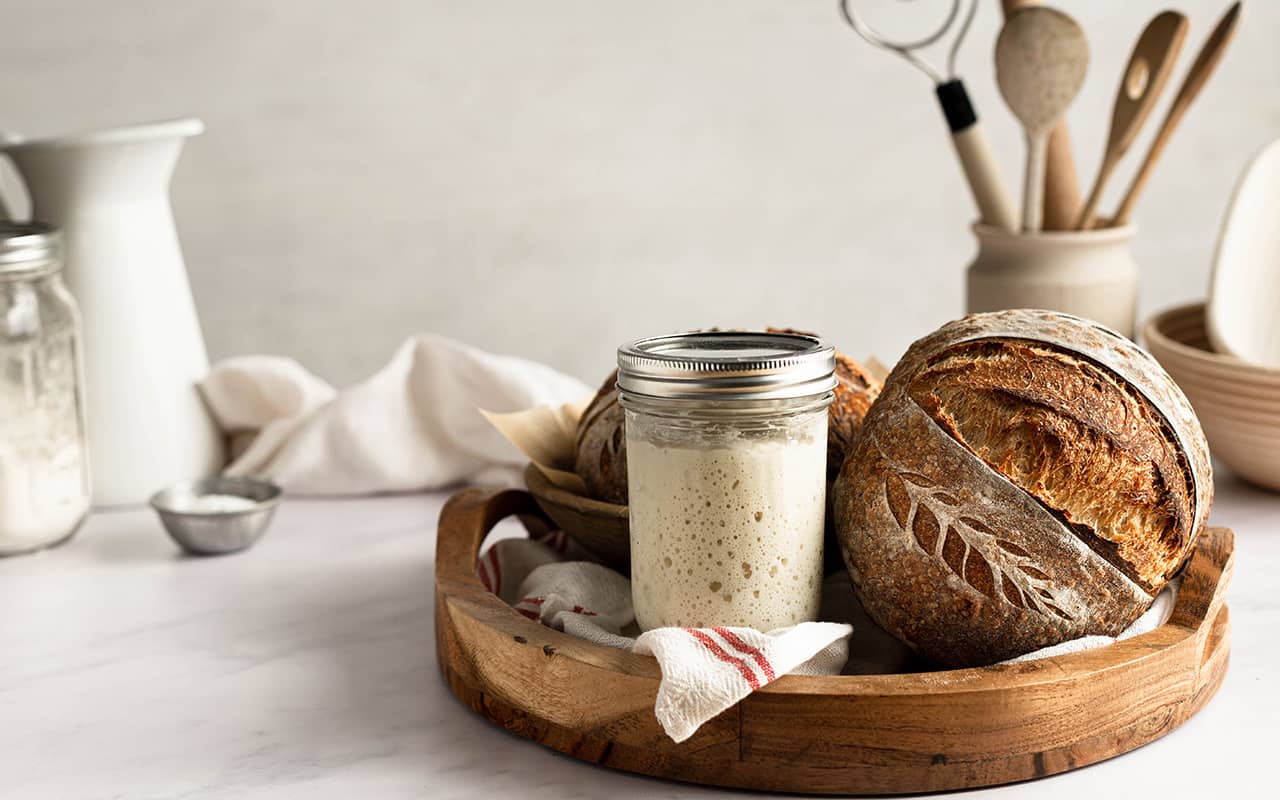
Sourdough Starter: From Creation to Maintenance
(By Hannah Dela Cruz, blogger and cookbook author)
Creating a sourdough starter is an act of pure alchemy, transforming the simplest ingredients into a universe of complex microorganisms that if nurtured properly, can feed you for a lifetime.
When flour is mixed into water and allowed to ferment, the mixture creates a symbiotic culture of yeast and healthy bacteria. With regular maintenance this culture develops a unique flavor and will leaven bread. Creating a starter from scratch is a simple but lengthy process. It takes about two weeks for a starter to fully mature, so patience is key.
Although it is possible to buy a starter, or get some from a fellow baker, creating your own has rewards. You will understand how it reacts to stimuli and how to nurture it with the ideal environment. These skills are fundamental to becoming a better bread maker.
The Science Behind Sourdough Starters
How does a starter work?
The flour, water, even your hands and the air around you, contain a community of microbes that all become part of your sourdough culture. The starter you make in your kitchen will be unique to you, different from one made in a bakery in San Francisco or a café in France. In fact, a recent study of sourdough starters found that “different bakers had different microbial communities in their starters despite all bakers [in the study] using the same starter recipe and using the same flour source.” Even if you purchase a starter or get one from a friend, over time that starter will become unique to you.
Starter is a living organism that needs to be fed with water and flour. Yeasts and beneficial bacteria multiply and eventually dominate your culture, beating out harmful microorganisms. After several weeks, your starter will have built a healthy, balanced community of microorganisms that can be relied upon to make delicious bread.

Humans have been nurturing sourdough starters for centuries, yet the majority of microbes in them are still largely unknown to scientists. We do know they contain multiple species of yeast and lactic acid bacteria, both of which are responsible for the unique characteristics of bread. As yeast metabolizes flour it produces carbon dioxide, the gas responsible for making dough rise and for giving bread its soft and airy texture. Meanwhile, lactic acid bacteria convert carbohydrates into organic acids, such as lactic acid and acetic acid, which gives sourdough its characteristic tangy flavor.
Understanding what’s happening inside your starter jar is one of the key steps to truly becoming a great baker. Sourdough starters respond to their environment, flour, water and slight temperature shifts. Learning how to manipulate these factors to control your starter is one of the keys to making great bread.
How do I feed my starter?
A few days after creating your starter, you’ll need to feed it. Simply retain a portion of your starter (discard the rest) and add fresh flour and water. For example, to 30g of starter add 60g of water and 60g of flour. Stir thoroughly to make sure all the flour is hydrated. While yeasts are voracious eaters, they can’t metabolize dry flour.
What do I feed my starter?
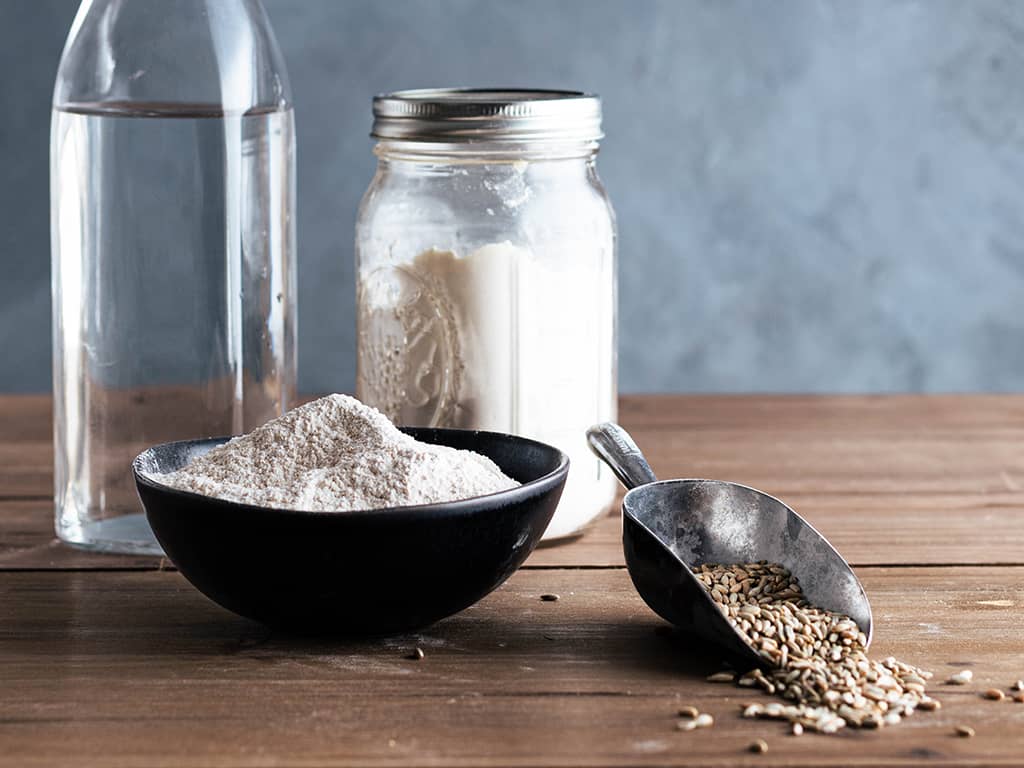
You can use any type of flour. This recipe uses all-purpose because it’s inexpensive and easily available. Because most recipes call for a starter that’s made with white flour, it also makes for the most versatile starter. When possible, try to support local producers who farm and process flour with methods that nurture the land and are kind to the environment. Only use unbleached flour, as bleached flour has been processed with chemicals that leave it devoid of beneficial nutrients.
Some bakers maintain starters with whole wheat, freshly-milled or even gluten-free flours. Your starter is able to metabolize all these types of flour, but may behave and look differently from one made with white flour. You can also use different flour types to control the sourness of your bread.
When creating a starter, use filtered or bottled water. Local tap water is treated with chlorine, which can harm the microorganisms in your starter. Once you have an established culture, you may use tap water.
You’ll find starter is very forgiving. Although ingredients do make a huge difference, if you accidentally feed your starter a different type of flour or tap water, don’t worry! Just continue feeding it with the right type of flour and water and it will rebalance itself and continue to thrive.
The same goes for missing a feeding day. Watery starter is usually an indication that you’ve gone too long without feeding your starter and it has thoroughly exhausted its food source. Simply feed it and it will spring back to life! If you go way too long without feeding your starter it may develop a layer of dark murky liquid on its surface. This is called hooch, an alcoholic byproduct of the fermentation process. Hooch is completely harmless. You can pour it out before feeding your starter or stir it in (this will add more acidity to your starter and make it develop a more sour flavor).
While your starter is very resilient, making great bread requires maintaining a regular feeding schedule. Yeast need nutrients from flour to thrive, without this they may grow too weak to fight off mold or harmful pathogens that are competing for dominance in your culture. Watch out for any fuzzy growth, or shades of beige and orange on the surface of your sourdough starter, this is mold. If your starter grows mold, throw it away and start over.

Starter Hooch
Do I really need to throw away my starter?
The concept of discarding a portion of your starter during feedings is perhaps one of the most bewildering for those new to sourdough. With each feeding, you’ll need to throw out a large amount of your starter. Remember that your starter is a community of yeast and bacteria, as you feed your starter these microbes go through their lifecycle, they multiply and die off. If you don't discard any of your starter you’ll have more than you can possibly maintain.
You don’t need to throw your discarded starter in the garbage. Any portion of sourdough starter that's not kept back for feeding or used for baking is commonly referred to by bakers as “sourdough discard.” As the interest in sourdough has increased in recent years, so have the inventive recipes that use this discard as an added ingredient. Once your starter has matured, you can add your discard to pancakes, crackers, focaccia, or even pasta! After each feeding, keep your discarded starter in a separate container in the refrigerator. Your discard won’t have to be fed and can be kept indefinitely, as long as it does not grow mold or develop any strange aromas

Honey Sea Salt Focaccia made with Sourdough Discard

Sourdough Pasta Made Using Starter Discard
What equipment do I need?
- Wide mouth glass jar with lid (at least 16 oz / 0.5 l). Note: Keep jar loosely covered. If sealed tightly, pressure may build up in your jar and cause the lid to blow off.
- Spatula with narrow head and long handle. Ideal for stirring and getting into the bottom of your jar.
- Precision Kitchen Scale. Volume measurements of flour are very inaccurate, so using a scale is important.
- Brod & Taylor Sourdough Home or Brod & Taylor Folding Proofer
Temperature is the most significant parameter that dictates the activity of yeast. When exposed to cold temperatures, your yeast will be sluggish and may grow too weak, while excessively warm temperatures will make your yeast overactive and difficult to control. For this reason, it’s important to create an environment where fermentation can occur at an optimal level, about 75°F (24°C) to 78°F (26°C).
The Brod & Taylor Sourdough Home and the Brod & Taylor Folding Proofer are able to maintain a stable temperature for long periods, preventing dramatic temperature swings which allows your starter to thrive.
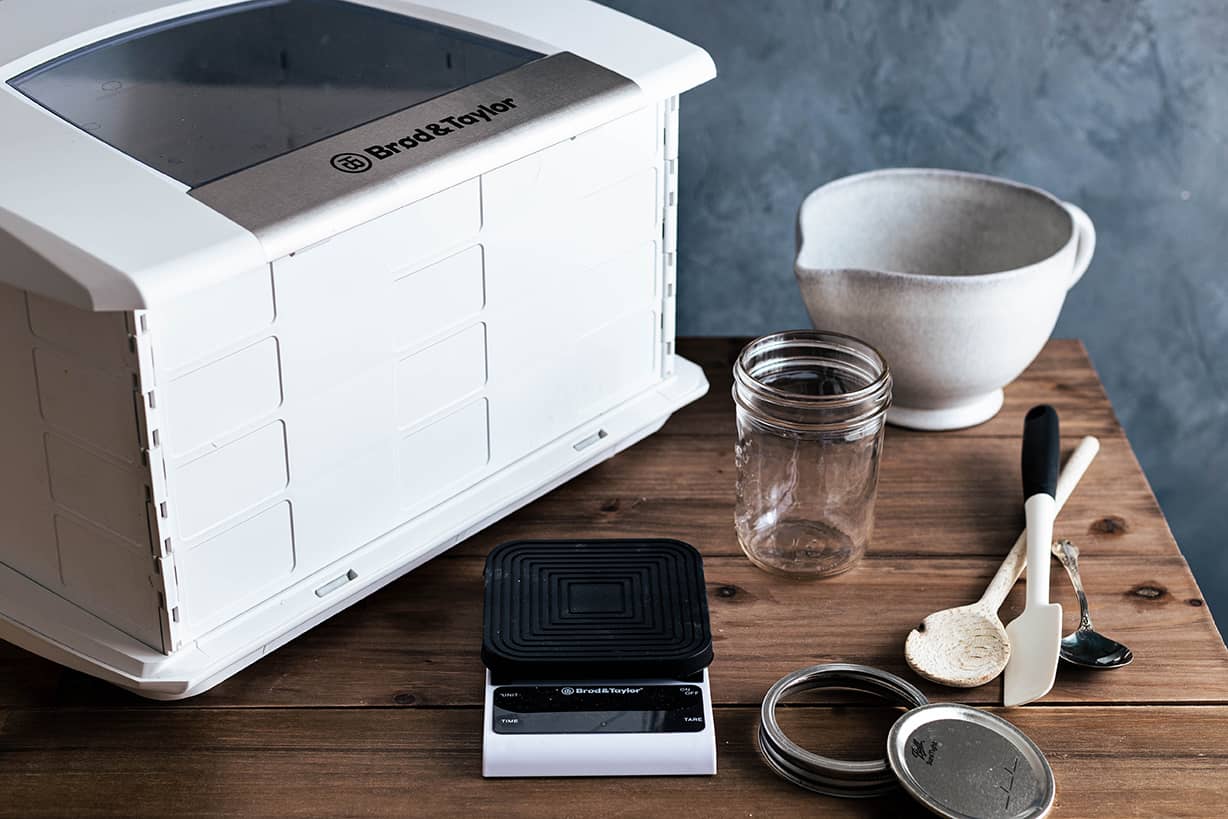
Brod & Taylor Folding Proofer, Precision Scale, and other tools needed for creating a starter

Brod & Taylor Sourdough Home
How do I know if my starter is ready?
As you nurture your starter for two weeks, you’ll notice dramatic changes. It’s aroma and appearance will change, it may display a burst of activity and there may be a period of time when it appears stagnant with no signs of life at all. This is all part of the process. Your job is to keep feeding it and observing these changes.
You’ll know your starter is ready when it begins to rise and fall reliably and predictably. This simply means that each time after you feed your starter it will rise, doubling or tripling in volume in a given amount of time (around 4 to 6 hours). If your starter does this every time you feed it, without fail, then it’s ready to use. You should also see an even distribution of tiny bubbles in your jar, and your starter should look thick with a webby structure.
Do not try to use your starter in a bread recipe before it has reached this point as it will be too weak and unreliable. Using an immature starter will only lead to a failed bake, wasted ingredients and frustration. Remember the most important ingredient in breadmaking is patience!
Unless your starter grows mold it remains alive and viable. Because temperature is vital in the development of your starter, housing it in the Brod & Taylor Sourdough Home or the Brod & Taylor Sourdough Folding Proofer will add to your chances of success.
Sourdough Starter Recipe
Scroll to Printable Recipe
Yield: 1 sourdough starter
Timing: Active: 10 minutes per day; Inactive: 23:50 per day; Total: 14 days
Note: This recipe creates a 100% hydration sourdough starter, meaning it is fed with equal parts flour and water.
Ingredients
Sourdough Starter
| Ingredient | Grams | Baker's % |
|---|---|---|
| All-Purpose Flour | 30 | 100% |
| Water | 30 | 100% |
Starter Feedings
| Ingredient | Grams | Baker's % |
|---|---|---|
| Sourdough Starter | 30 | 50% |
| All-Purpose Flour | 60 | 100% |
| Water | 60 | 100% |
Equipment
- Brod & Taylor Sourdough Home or Brod & Taylor Folding Proofer
- Small mixing bowl
- Spatula or wooden spoon
- Wide mouth glass jar with lid (at least 16 oz / 0.5 l)
Instructions:
Day 1: Combine 30g of flour and 30g of water in a jar. Stir thoroughly until no dry bits of flour remain. Cover your jar with a lid and place it inside your Brod and Taylor Sourdough Home or Folding Proofer with the temperature set to 78°F (26°C) with no water tray to ferment for 24 hours.
Note: The Brod and Taylor Folding Proofer is calibrated for open containers. Storing a closed jar in the center of the proofer will make its contents about 3 to 5 °F hotter than the set temperature. Once you establish the proper set point temperature for your setup, it will remain very stable over time.
Day 2: Uncover and stir the starter but do not feed. Place it back in the Sourdough Home or Proofer for another 24 hours.
Day 3: Your starter may begin smelling a little unpleasantly sour, like a really sharp cheddar cheese, and appear viscose and watery. This is a good indication that it has metabolized the flour and is now ready for the first feeding.
Empty out the contents of your starter jar, weighing out 30g of starter into a small mixing bowl and discarding the rest. You won’t be able to save your discard for baking at this point as it may have some off flavors and not be acidic enough to kill any harmful bacteria. Add 60g of flour and 60g of water to the mixing bowl and stir thoroughly until no dry bits of flour remain.
Scrape out your starter jar thoroughly. Transfer the fed starter back into the jar, cover and place it back in the Proofer or Sourdough Home.
Day 4: You may notice a burst of activity in your starter at this time. It may look bubbly, and you may notice some traces of starter on the side of your jar; these are signs that it rose overnight. This is an exciting development, but don’t let it fool you! Your starter is nowhere near ready and won’t be strong enough to bake with at this stage.
Feed your starter once again by combining 30g of starter, 60g of water, and 60g of flour in a small mixing bowl. Stir thoroughly until no dry bits of flour remain. Throw away any remaining starter in your jar and place your fed starter inside. Cover the jar and store it in your Proofer or Sourdough Home.
Days 5 to 7: Your starter may experience a lull of activity during this period. It may appear flat and watery with little to no bubbles. Continue the 30g starter / 60g flour / 60g water feeding once a day. Take note of any slight changes in the aroma and consistency of your starter. It may begin smelling more like yogurt or sour cream.
Days 8 to 10: After a few days of sluggishness, your starter may finally begin to display some signs of activity! It should appear more bubbly, show signs that it has risen, it may appear thicker and begin smelling more pleasant, similar to bread or beer. Although your starter is starting to build its strength it may not be ready to make bread just yet.
Continue to feed your starter once a day. Cover the jar and store it in your Proofer or Sourdough Home. At this point, you can begin keeping your sourdough discard and using it in recipes.
If your starter continues to appear lifeless, try replacing 15g of the all-purpose flour with whole wheat or rye to encourage fermentation. Don’t be discouraged if your starter seems to develop at a slower pace, remember, each sourdough starter is unique. While it may take some time, it will eventually build enough strength to leaven bread as you continue to nurture and feed it.
Days 11 to 14: Your starter is gaining strength and will soon be ready to leaven bread. At this stage, your starter should rise and fall at a predictable rate, every 4 to 6 hours. It should also be thicker in consistency. You’ll see lots of bubbles distributed throughout, and it should look webby when you scoop it out of the jar.

On the left: Just fed starter. On the right: Fully ripe starter
You can begin feeding your starter twice per day to get it ready for baking. To keep things easy, you can feed it once in the morning when you wake up and once more before you go to bed.
To test the readiness and vigor of your starter, feed as you normally would by combining 30g of sourdough starter (don’t forget to discard the rest), 60g of water, and 60g of flour. Return your starter to the jar, cover and place a rubber band to mark the level of your starter right after feeding. Place your jar into the Proofer or Sourdough Home and set a timer for 4 to 6 hours. The starter should double or even triple. Do this a few more times. Once you observe your starter doing this consistently, you’ll know it’s ready to make bread rise!


Maintaining your starter:
Maintaining a vigorous and healthy starter is key to achieving great results with your sourdough bread. The ideal time to feed or use a sourdough starter is when it peaks or shortly after. Doing so will ensure the yeast and bacteria populations are at their height and fermentation activity is strong. Use it too soon, and the starter will not be vigorous enough. Wait too long, the starter will become overly acidic, and the yeast population will decrease.
We recommend using a temperature-controlled environment like the Brod & Taylor Sourdough Home. Your goal is to nurture your starter so that it’s consistent and dependable. Forgetting to feed your starter or slight changes in temperature may affect the strength, activity and taste of your starter.
Daily feeding is important when initially creating a sourdough starter. Once you have an established starter, you may adjust your feeding schedule to fit your needs. Storing your starter in a cooler environment, like the Sourdough Home, will slow fermentation activity, requiring less frequent feedings. By keeping your starter cool but not cold, you can slow down fermentation without bringing it to a complete halt. Your starter will stay healthy and ready to use when you're ready to bake.
Storage
If going away for an extended period of time, you can store your starter in the Sourdough Home set to the lowest temperature or in the refrigerator. You’ll want to remove the starter a day or two before baking and feed it a couple of times to ensure it is vigorous enough to be ready for baking.
Another option for long-term storage is dehydrating your sourdough starter. It makes a shelf-stable starter by suspending the microorganisms in an inactive/dormant state that will last years and is a great way to transport your starter, share it with friends, or ensure you have some backup if something happens to your mother culture. A dehydrated starter is easily brought back to life by feeding it with flour and water for a few days.
Preparing your starter for baking:
There are many ways to prepare a starter for baking. Many bakers make a secondary culture from their ripe sourdough starter or “mother culture,” which is then mixed into the bread dough. This secondary culture, often called a “levain,” is essentially the same as a starter and allows easy adjustments to hydration level and flour type without altering your original starter.
Other bakers will mix in their starter- just make sure you have a portion of your starter set aside that you can continue to maintain. For example, if your recipe calls for 150g of active starter, you’ll need to combine 35g of starter with 70g of flour and 70g of water – this will make enough starter for your recipe, plus some extra for continued maintenance.
Ready to Get Baking?
Ready to get baking? Try our Beginner's Sourdough Bread recipe to get you started, learn How to Make Sourdough More (or Less) Sour, and explore our range of culinary products designed to help you achieve professional results at home.


